I must first say that I intended this post to be for Tuesday. It didn't make the cut because I was having problems with my photo files. My photo editing software couldn't recognize the photos. I wanted to smudge or erase certain information. Since the software and photos weren't cooperating, I retook the photos while covering certain information with paper. Not how I wanted it to look, but hopefully you can still see the quality.
Moving onward...
I've been wanting to make C a personalized plate for a while now. I never got around to it and all of the ones out there to purchase were pricey. I saw this tutorial and was sold!
My creative juices got to work over the past months and I came up with two other designs I made for the grandparents for Mothers Day. They would work for any gift giving event really.

Pick up a white plate from the dollar store and some porcelaine150 markers from your craft store (don't forget your coupon!) and get to work. For around $3.50 or less (less if you make more than one plate and reuse your marker(s)) per plate you can't go wrong when giving one of these as a gift.
Personally, I think these are the best homemade and possibly best gifts overall that I've ever given. C loves his plate and I know the Grandma's will too!


 Materials:
Plate/ mug/ bowl
Pencil
Porcelaine 150 marker (Any thickness you prefer. The orange was the only one that wasn't fine tip).
Tip: When purchasing the porcelaine 150 marker (for china) shake it and make sure you hear the ball. Otherwise don't purchase it as it will not work. When using for the first time shake vigorously for a while and try it. It might take a couple times to get it to work properly, but you should start to see some color on the tip fairly quickly.
Go on your computer and look at different fonts to get your creative juices flowing. Or start sketching your design on paper.
Graduate to sketch on the plate using a pencil.
Go over your design with your porcelaine150 marker.
Let dry for 24 hours.
Bake at 300 degrees for 35 minutes.
Please know, that these are dishwasher safe and food safe. Don't just use them for display, eat off of them!
Moving onward...
I've been wanting to make C a personalized plate for a while now. I never got around to it and all of the ones out there to purchase were pricey. I saw this tutorial and was sold!
My creative juices got to work over the past months and I came up with two other designs I made for the grandparents for Mothers Day. They would work for any gift giving event really.

My favorite part of this and other plates I made are that they can be expanded
if there are more grandchildren.
Pick up a white plate from the dollar store and some porcelaine150 markers from your craft store (don't forget your coupon!) and get to work. For around $3.50 or less (less if you make more than one plate and reuse your marker(s)) per plate you can't go wrong when giving one of these as a gift.
Personally, I think these are the best homemade and possibly best gifts overall that I've ever given. C loves his plate and I know the Grandma's will too!

C's plate,which he loves!
This is on our dinnerware that we've had for years (and I love!).

A branch for each child and add leaves (with names) for grandchildren.
On the bottom add the last name as well as anniversary date.
This is incomplete since my green didn't work and they were out of green to replace it with.
I was also verifying full names and spellings. With something like this I didn't want to assume!

Plate/ mug/ bowl
Pencil
Porcelaine 150 marker (Any thickness you prefer. The orange was the only one that wasn't fine tip).
Tip: When purchasing the porcelaine 150 marker (for china) shake it and make sure you hear the ball. Otherwise don't purchase it as it will not work. When using for the first time shake vigorously for a while and try it. It might take a couple times to get it to work properly, but you should start to see some color on the tip fairly quickly.
Go on your computer and look at different fonts to get your creative juices flowing. Or start sketching your design on paper.
Graduate to sketch on the plate using a pencil.
Go over your design with your porcelaine150 marker.
Let dry for 24 hours.
Bake at 300 degrees for 35 minutes.
Please know, that these are dishwasher safe and food safe. Don't just use them for display, eat off of them!
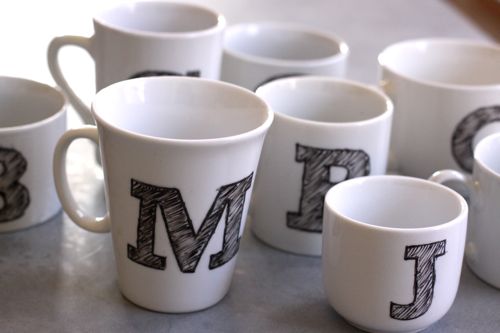
In the future I'll be making more items. Perhaps these Monogram Mugs or perhaps bowls?
Those of you reading that know me personally, don't spoil it for the intended recipients. If you're reading this and you're an intended recipient, hope you like it!
Now you just have to wait for us to visit!
Those of you reading that know me personally, don't spoil it for the intended recipients. If you're reading this and you're an intended recipient, hope you like it!
Now you just have to wait for us to visit!
No comments:
Post a Comment